


Building on our Alu-Cab Icarus review, we’d also like to share our experience of the installation process. While, in essence, it’s a bolt-on upgrade that can be completed in just over a day, there are several factors that can significantly affect both the duration of the install and the overall scope of the work. This is what our installation looked like, and what we’d pay attention to if we were to do it again.
It’s worth mentioning that this pop-top had been in the works for well over 18 months, but the final decision to proceed was made on a Friday, with the installation taking place the following Monday and Tuesday. So while we had plenty of time to dream and plan, actually preparing everything and getting it done happened within just a few days. With that in mind, we’d like to thank Gateway Offroad Centre for their incredible input and flexibility in making it all come together at such short notice.
Before we started unbolting the roof of Rafiki, we made sure we fully understood what we were installing. We checked which version of the Icarus pop-top was going on. Over the years, Alu-Cab has made both major and minor changes, ranging from latch systems to tent fabric and construction details. Knowing the model year helps avoid surprises during installation. In our case, we discovered that the construction and fabric were the latest versions, while our soon-to-be roof still had the older latches fitted. Luckily, that will be an easy fix later on.
We also checked that the hinges and gas struts moved smoothly, without binding or uneven resistance. Any stiffness at this stage will only become more noticeable once the roof is mounted.
Another thing worth checking is moisture or mold — both on the pop-top box and, if possible, on the tent fabric and ceiling liner. You never know if the unit has been exposed to the elements for a while, and this is easiest to inspect while it’s still on the ground.
Finally, we had a conversation about electrical routing. By default, the interior lighting is usually connected to the vehicle’s main electrical system. We specifically asked for the power cable to be routed to our household battery instead, which is much better suited to how we use the lighting in daily life.
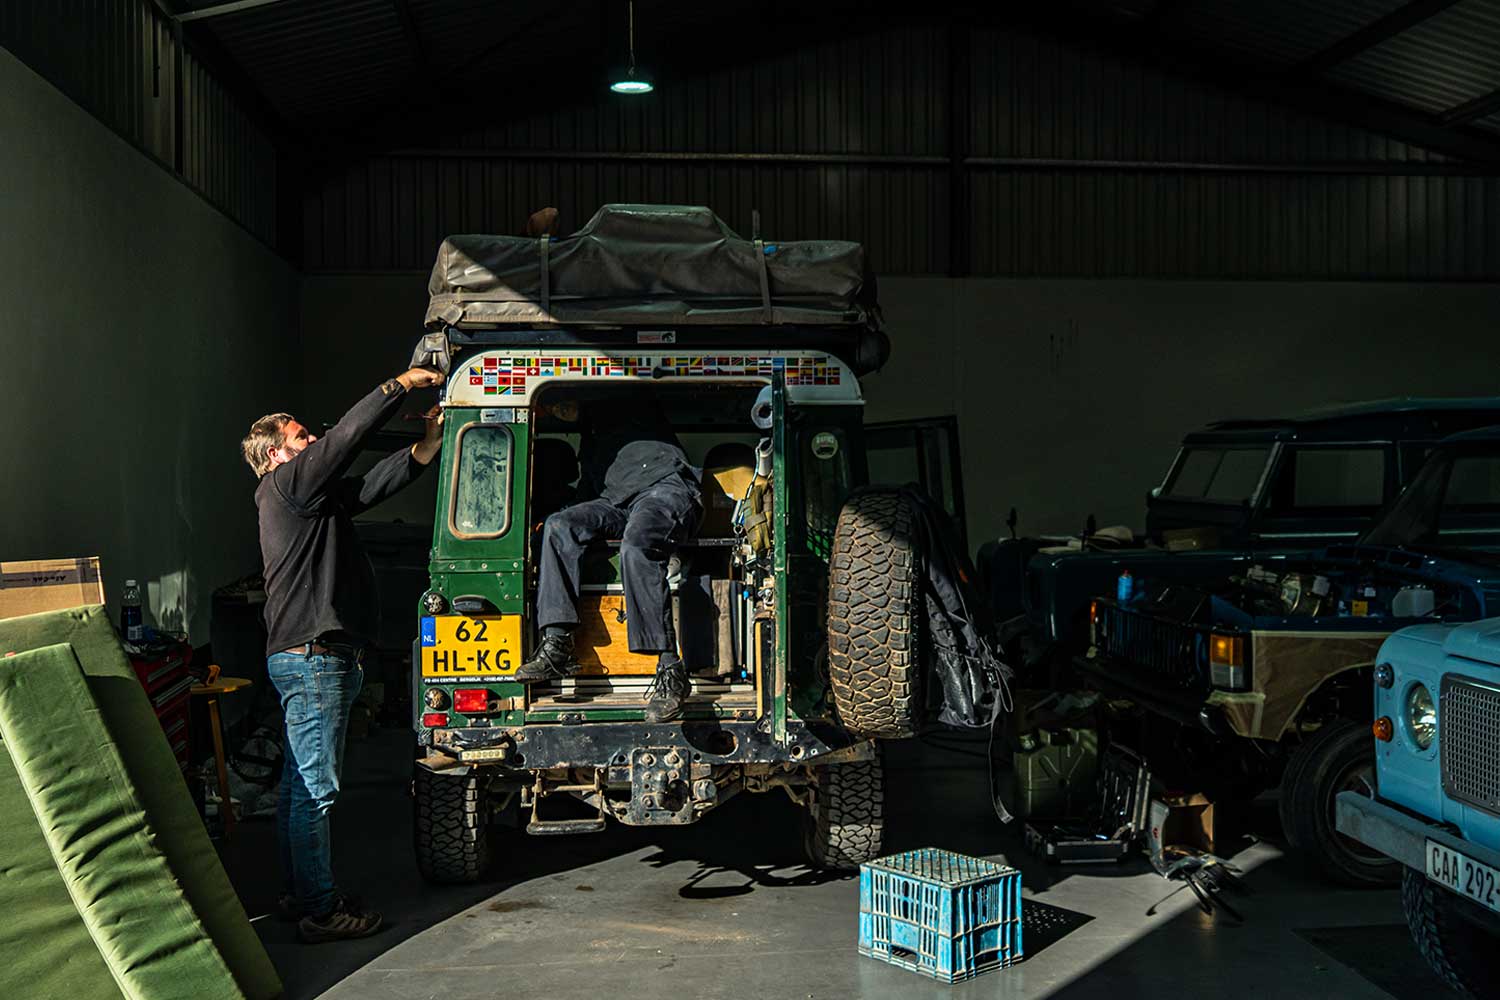
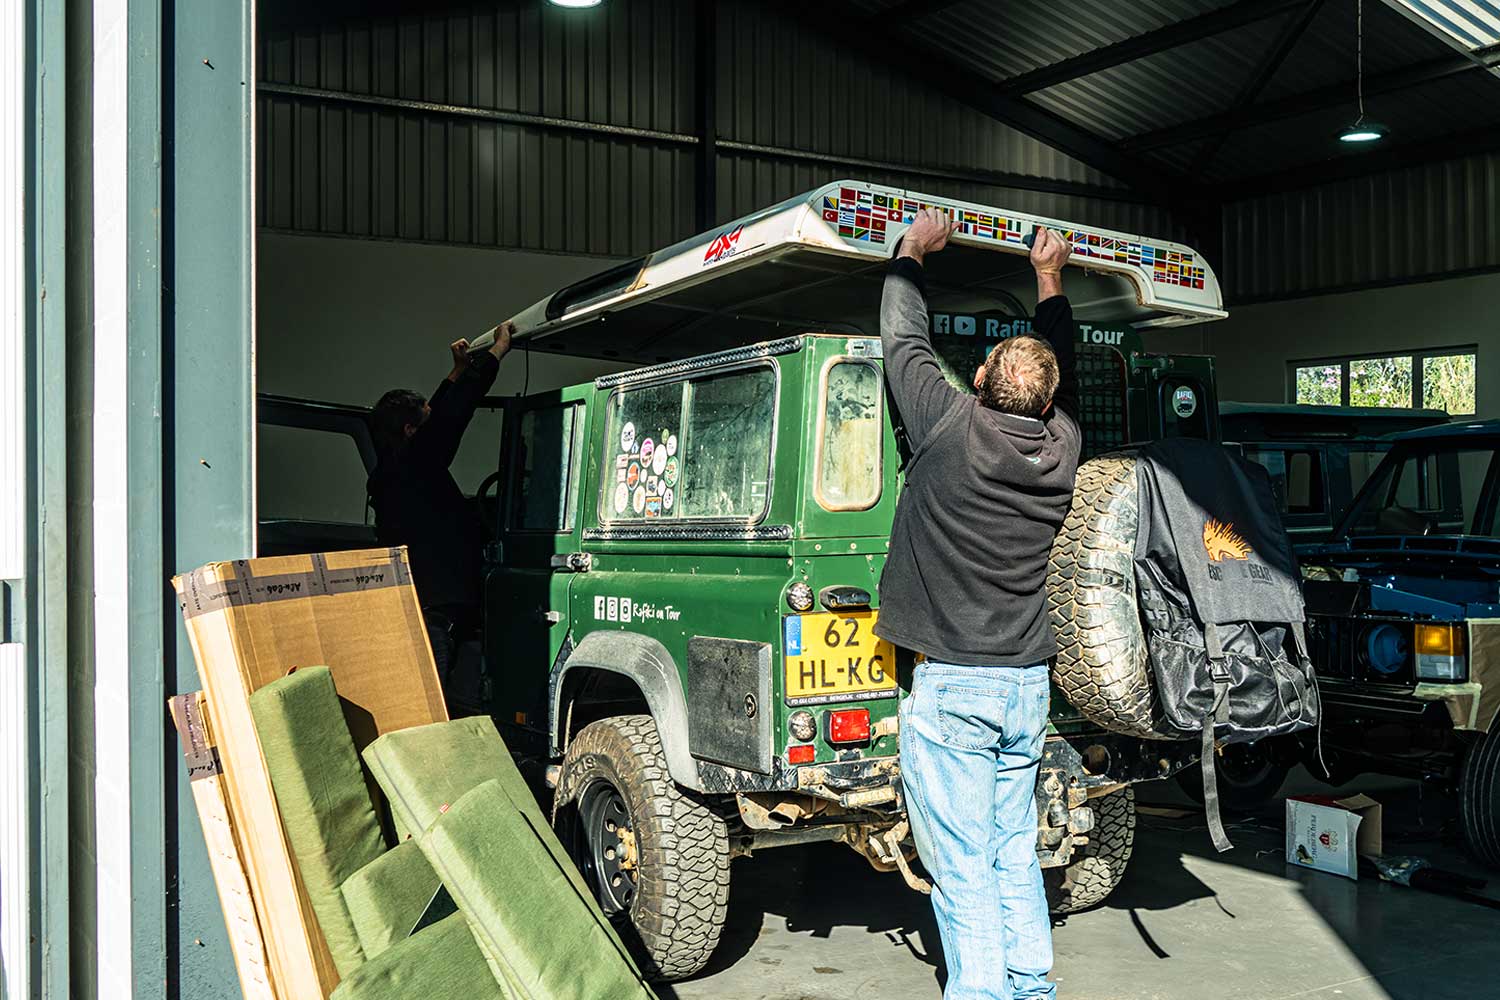
Even though the Icarus is a bolt-on solution, getting to the point where it can be mounted involves quite a bit of work. Most of the interior trim needs to come off, followed by the removal of the ceiling liner. This gives access to all the bolts that hold the roof in place. Removing the trim is generally straightforward, although it can become more challenging depending on your interior setup. In our case, the storage compartments were fitted very close to the side window panels, which made their removal fairly difficult.
Stripping the interior can be done before visiting the workshop and will actually help speed up the process. We removed everything at the campsite and put it all into storage. Once at the workshop, it was simply a matter of removing the rooftop tent from the roof rack, taking the roof rack itself off, and then unbolting the roof and lifting it away. The team managed to do all of that in just over an hour.
With everything exposed, it was time to tackle a few small issues before mounting the new Alu-Cab Icarus onto Rafiki.
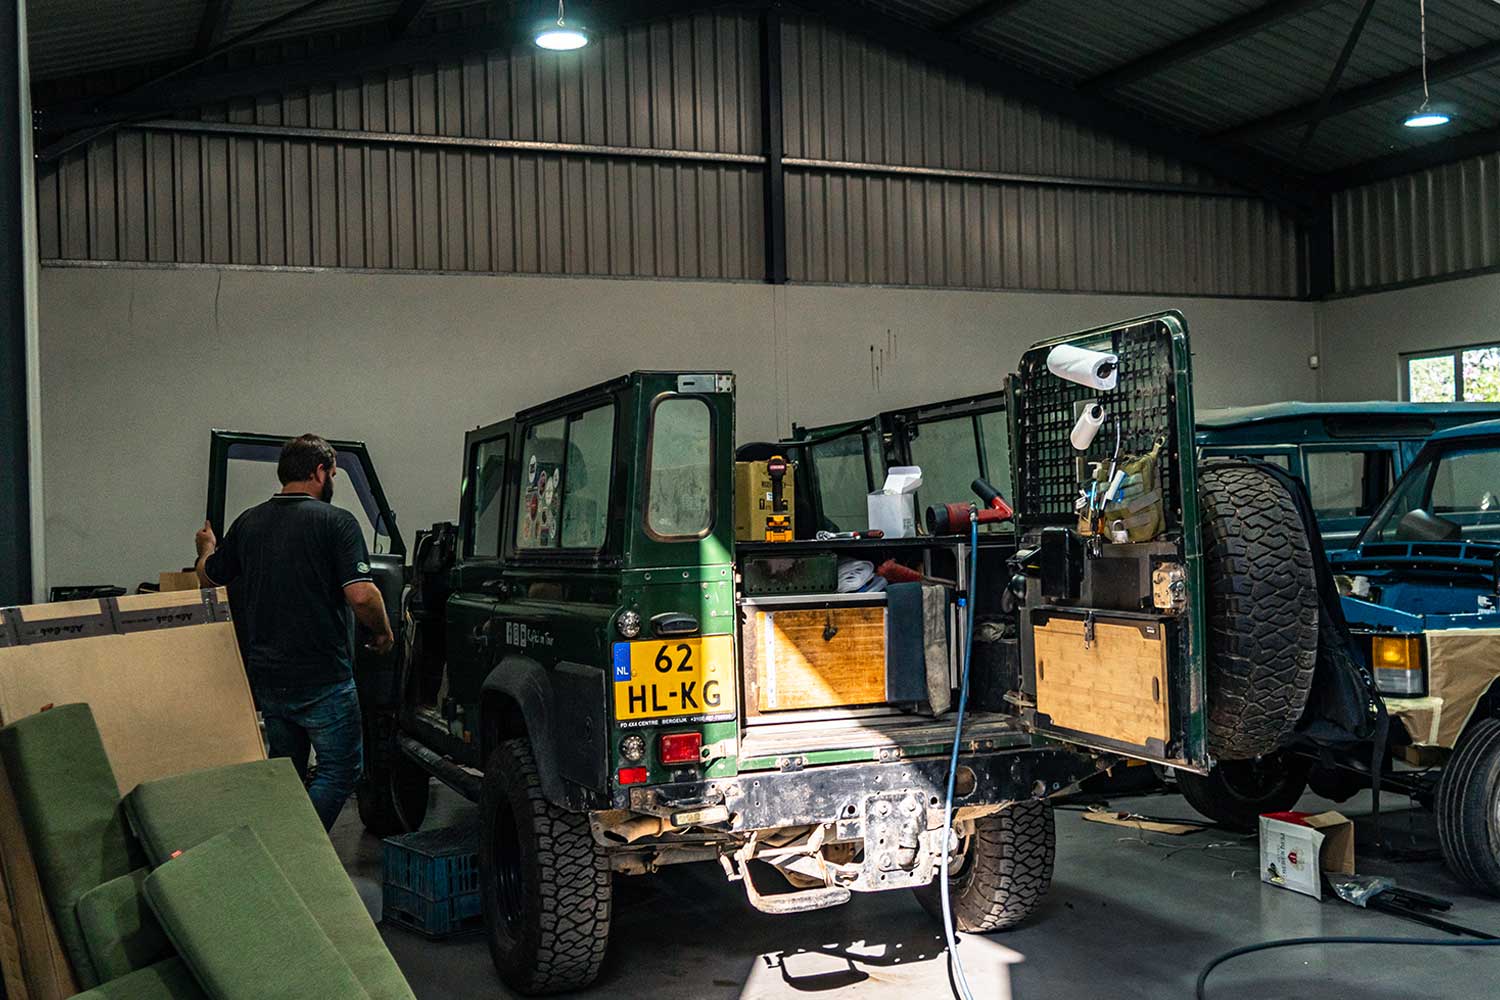
With the roof and ceiling removed, we took the opportunity to tackle several jobs that would otherwise be difficult or time-consuming. We replaced the door rubbers, inspected and treated rust in the bulkhead near the A-pillars, and checked all rivets and nuts connecting the upper bodywork to the lower sections. In our case, we discovered many missing rivets and even a few loose nuts, issues we would never have found without stripping the vehicle this far. It also explained why Rafiki had been rattling so much: the left rear was almost completely detached, with only our Front Runner jerrycan holder effectively holding things together.
We also replaced the window seal underneath the window frame and repainted the window brackets, taking the chance to tidy everything up before reassembly. The window seal, in particular, is one of the most important items to address at this stage. The foam perishes over time, and replacing it with the roof still fitted is extremely difficult. With the roof off, it’s a quick and straightforward job.
Overall, we’d strongly recommend factoring in extra time for these kinds of smaller tasks. With everything exposed, you finally have the chance to do things properly. Expect to need rust treatments, new seals (both door and window), sealant such as liquid gasket, and a selection of nuts, bolts, and rivets.
One of the most important parts of the entire process is, of course, the installation of the roof itself — something we haven’t touched on yet. While it may sound like the biggest step, the actual removal of the old roof and fitting of the new Icarus is surprisingly straightforward. What takes time is everything that happens around it.
Before the new roof went on, we made sure all other small improvements were completed. Once the pop-top is in place, access becomes limited again, so this really is the last chance to do things properly.
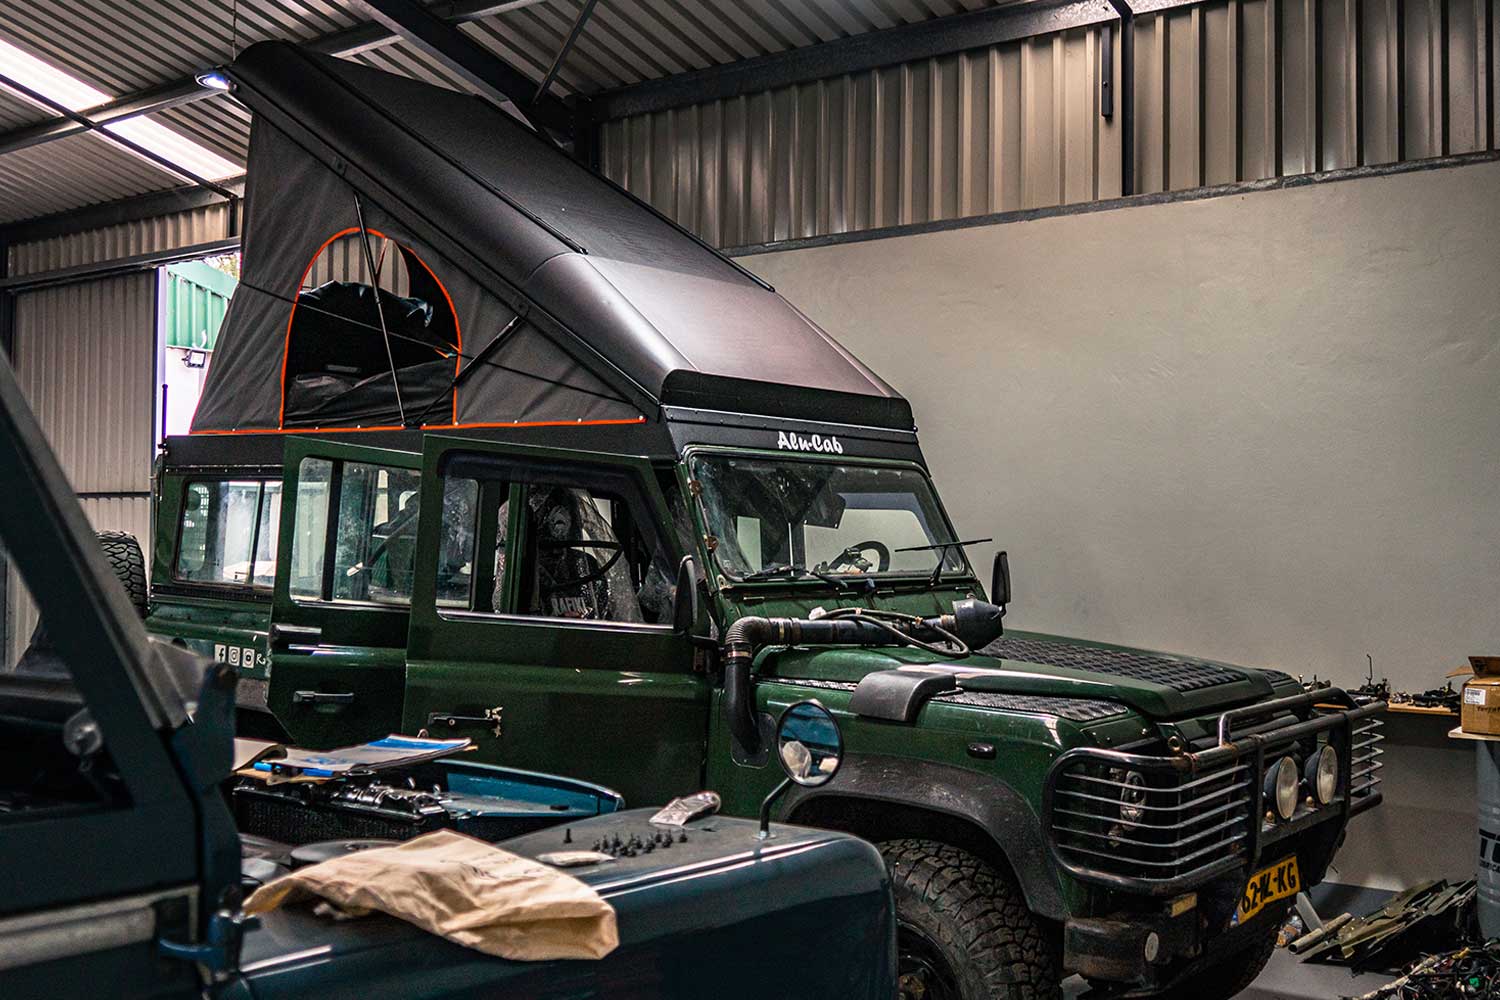
With that done, sealant was applied to the tops of the body panels, after which the Icarus roof was lifted onto the vehicle. From there, it’s all about careful positioning: aligning the pop-top correctly and ensuring the bodywork sits evenly before anything is tightened down. Once everything lined up as it should, the roof was bolted into place.
Although the Icarus is supplied as a complete, ready-to-install solution, fitting it still involves a number of additional tasks. These include installing interior trim panels, mounting the helper strut brackets and struts, connecting the electrical wiring, and dealing with various smaller components that come with the kit.
In practice, removing the old roof and lifting and bolting on the new one is the easy part. It’s all the finishing work around it that ends up taking most of the time.
You can find the original Alu-Cab Icarus fitment manual here.
We combined the Icarus installation with a few interior upgrades, which made sense while we were bringing everything up to speed for Rafiki 3.0. This included fitting an interior dropdown table and an adjustable fold-up backrest, both original Alu-Cab accessories.
The dropdown table is a very practical addition, but its position is dictated by the ceiling beam structure, which means it sits slightly higher than ideal. Installing it was easily one of the more nerve-wracking parts of the process. The key takeaway here is simple: measure three times and double-check everything. The original manual supplied with our table showed a different mounting position; following it would have meant drilling straight through the ceiling and roof, completely missing the structural beam.
You’ll also need to drill through the ceiling liner, which is surprisingly tricky. If you drill straight through the fabric, there’s a high risk of the threads spinning and fraying. To avoid this, we either melted the fabric slightly or cut it into a small cross before drilling. Once the holes were made, the rest of the installation was straightforward: mounting the brackets with the supplied rivets and bolting the table platform into place. We put a bit of white liquid sealant on the fabric to permanently seal all the threads in place.
You can find the original Alu-Cab Icarus Dropdown Table instructions here.
Installing the fold-up backrest was relatively straightforward, although here too the manual wasn’t entirely clear. It instructed us to remove the old access hatch by fully dismantling the hinges, even though you can leave the hinges in place and simply remove the original hatch itself.
To remove the old hatch, you do need to cut through the trim fabric and carefully dismantle the existing LED light. We took our time with this step, as we planned to reinstall the LED on the new backrest structure, which worked out well in the end.
You can find the original Alu-Cab Icarus Backrest instructions here.
As long-term overlanders we fully understand the need for high-quality and reliable gear. We know that if gear isn’t up to standard it can hinder your adventures, resulting in discomfort or a dangerous situation.
We write our reviews after extensive testing and with you – an adventurous overlander – in mind. We hope you appreciate our information, and feel free to reach out if you have any questions.
Once everything is finished, it’s easy to feel slightly overwhelmed by the transformation your vehicle has gone through. It’s a major change, largely for the better, but not everything will necessarily work perfectly straight out of the box. There are a few upgrades worth considering once you’ve spent some time using the pop-top.
Depending on the weight of your roof rack and roof load, uprated gas struts may be one of the first improvements to look at. These are available directly from Alu-Cab, as well as from general automotive hardware suppliers. In our case, the original struts were able to lift the roof with the roof rack fitted (around 45 kg), but adding any extra weight made lifting noticeably harder. If you’re running a similar setup, upgrading the main side struts is well worth considering. Typically, this means moving from the standard 1000 mm / 500 Nm struts to either 650 Nm or 750 Nm versions. Keep in mind that Alu-Cab advises a maximum roof load of 50 kg to prevent damage to the structure, though.
Another worthwhile upgrade relates to water management. The factory gutter on the side of the pop-top only covers the front and second-row doors, leaving the rear section of the vehicle exposed. In addition, the guttering around the hinge area can be problematic, as water tends to drip straight into the footwell when the tent is open. To address this, Fidget Overland has designed a 3D-printed gutter extension kit that significantly improves water drainage in these areas. It’s a simple upgrade, but one that makes a noticeable difference in wet conditions. You can find their products on eBay; here on the UK store, here on the global store.
Installing an Alu-Cab Icarus pop-top is fairly straightforward; it truly is a bolt-on solution. While it’s not something you’ll remove between seasons, the installation does not involve cutting into the original roof or structural elements of the vehicle. Everything is mounted using existing attachment points, which means the process is fully reversible. If you ever decide to return the vehicle to its original configuration, that option remains open.
That makes the Icarus a semi-permanent upgrade rather than a one-way modification. It’s a significant change, but one that’s relatively easy to execute and, importantly, doesn’t permanently alter the vehicle itself.
At the same time, the installation opens up a unique opportunity to address other jobs. With so much of the vehicle exposed, it’s the ideal moment to deal with aging components, hidden rust, and small annoyances that are normally out of reach. To really make full use of the pop-top, however, a livable interior is just as important as the roof itself. For us, that naturally puts interior upgrades next on the list.
If you’re heading into a similar installation, our biggest advice is simple: plan ahead, communicate clearly with the workshop, and make the most of the access you have while everything is apart. It’s an approach that will pay off long after the roof is back on.
Don’t forget to continue reading and check out our Alu-Cab Icarus preliminary review.
Appreciate this info and have something to spare? Buy us a coffee!
We hope our blog provided you with practical information that’s useful to your adventures. Want to dive deeper into this or other subjects, and plan a call? We are here to help!


0 Comments