


This is how we went from a 9-person Station Wagon to an off-the-grid overland vehicle. Back in 2015, when we bought the Defender, it was an all-original Land Rover Defender 110 County with space for nine. It was a super cool vehicle to transport a bunch of friends, but in the months that followed we transformed it into an overland camper with a fridge and plywood camper interior. Skip a few years and we now have a professional aluminum interior with a drawer system, a 75-liter fridge-freezer combo, and one of the most unique setups out there. At least, we think so.
Let’s take a look! It’s a long one!

Back in 2015, we bought the Defender to transform it into a travel vehicle of sorts. We built a wooden interior that housed all our goods and gear. It had a fridge, curtains, storage drawers, and a foldable bed. It looked cozy and at first, it performed very well, but after dozens of smaller trips and the large 2017 and 2020/2021 expeditions, it was time for something new. That’s why, during our last big expedition, Tobias came up with a whole new layout: aluminum, lightweight & multifunctional. Easy access was the goal!
When designing the new interior we had several hard requirements. The interior needed to have a fixed bed to accommodate us during storms, we wanted a bigger fridge (possibly including a freezer) for longer off-the-grid travel in remote areas and it needed to be lightweight to keep the vehicles’ weight down to prevent excessive mechanical wear and a higher fuel usage.
The whole process was a massive undertaking. We expected the build to take about two to three months, but in the end, it took us almost eight months in our spare time. We started by noting down all the requirements and the lessons we learned from the previous years of travel. With that massive list of ‘to-do’s’ and ‘not-to-do’s’ as a guideline, we started drawing designs in Google SketchUp. In the meantime, we researched a multitude of materials. We ended up with BSB profiles. They were easy to work with, lightweight, and versatile, as the system comes with a great selection of accessories like brackets, hinges, and more. Once we finalized the design we realized that everything would revolve around the main drawer accommodating the fridge. Luckily we partnered up with CombiNoord for the fridge and it was delivered to our doorstep in a matter of days. The build process could start right away!
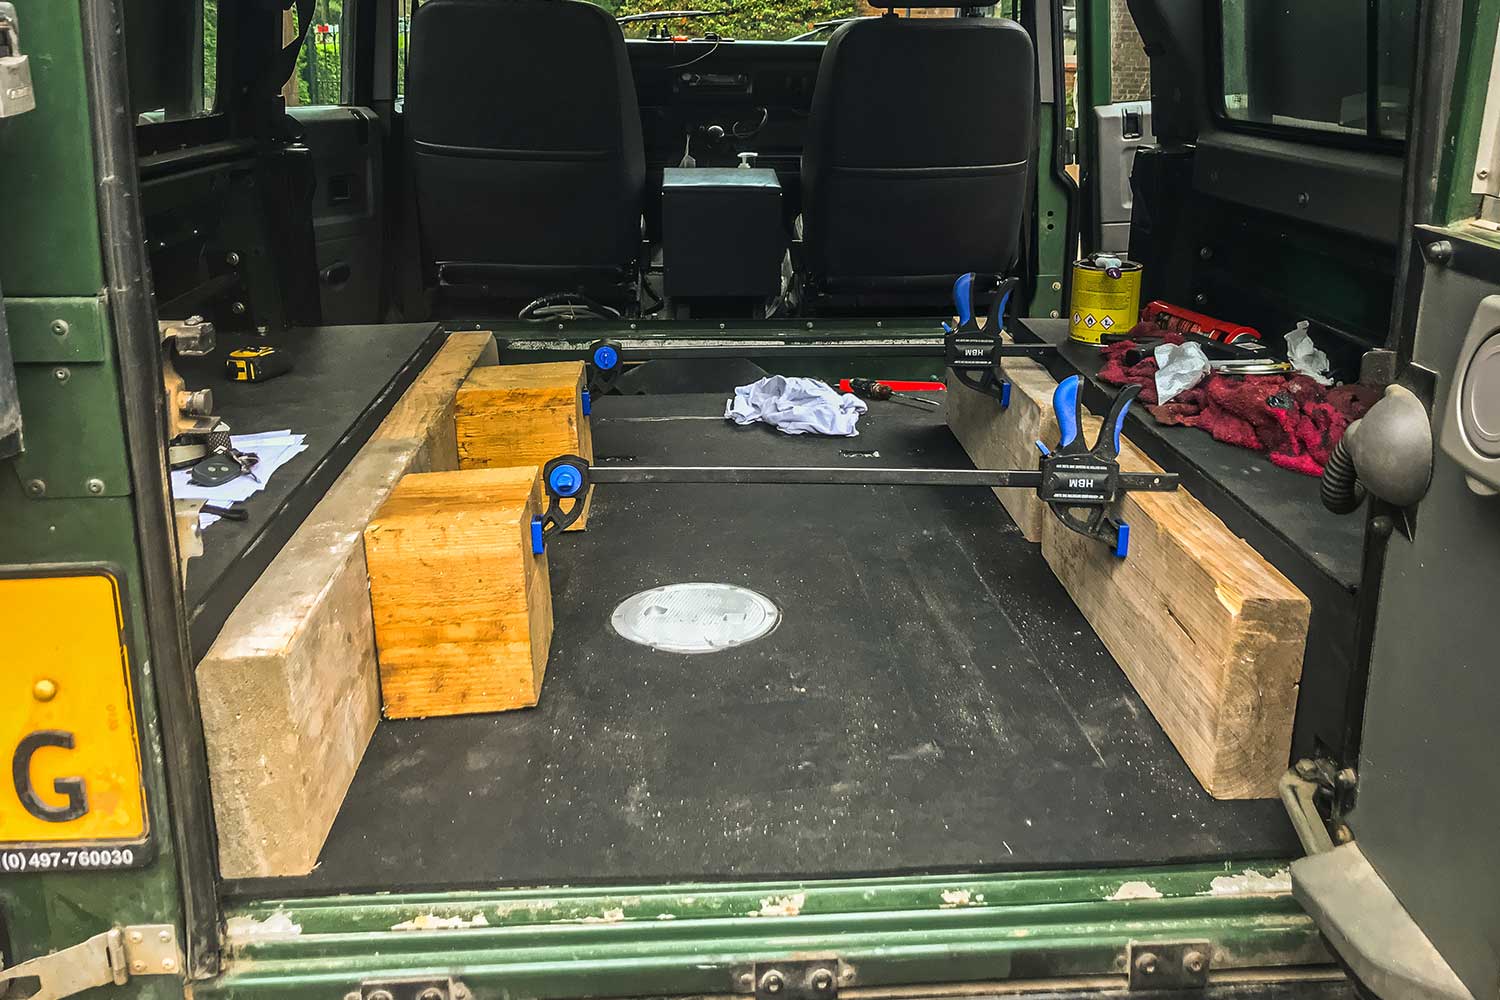
With the fridge delivered we knew what we had to work with. We made a general mockup of the bed platform from wood to test out the height. This was necessary as a Land Rover Defender isn’t super high, and we needed it to accommodate the fridge on a slider whilst leaving enough room for a mattress, sleeping bags and us to sleep on.
It took us dozens of meters of BSB profile (both 2×2 and 2×4 cm), hundreds of brackets, and thousands of bolts and nuts. In the end, the whole project took a lot longer than expected, almost drove us nuts, and cost us an arm and a leg. But as always, hard work pays off. We are super happy with the result and so far, it has survived nine months of travel (mostly in West Africa, which definitely proves its quality).
Let’s dive into what we build! The interior has a fixed bed of 185 x 135 cm, a main drawer at the rear, and multiple side drawers, storage compartments, and storage solutions on the windows. Besides that, it has an extensive electrical setup and enough storage space for international overland travel. We love the setup, but we also know things will always evolve in the future. Below you can read all about the Defender’s interior features.
After removing the old interior and its flooring we wanted something that was weather-resistant and could be cleaned easily. Besides that, it should be sound-dampening and hard-wearing.
After a lot of research and weighing our options we went for rubber mats, made from recycled car tires. These rubber mats are super heavy duty, hard-wearing, weather resistant, and dampen the sound of the body, just as we wanted. Do note that we have had minor problems with the rubber starting to expand and swell after coming in contact with the injector cleaner.
The mats are 6 mm thick and are glued into place using UHU Greenit 45400 150+ glue. The glue is weather- and heat-resistant and by using this, we made sure no moisture could get in between the aluminum and the rubber mats.
We also made an access hatch into the floor so that we could access the fuel pump system in the tank. This hatch already prevented us from dropping the tank in Senegal, when the seal on top of the tank started leaking. Although it is a bit sketchy to make, it is well worth the effort!

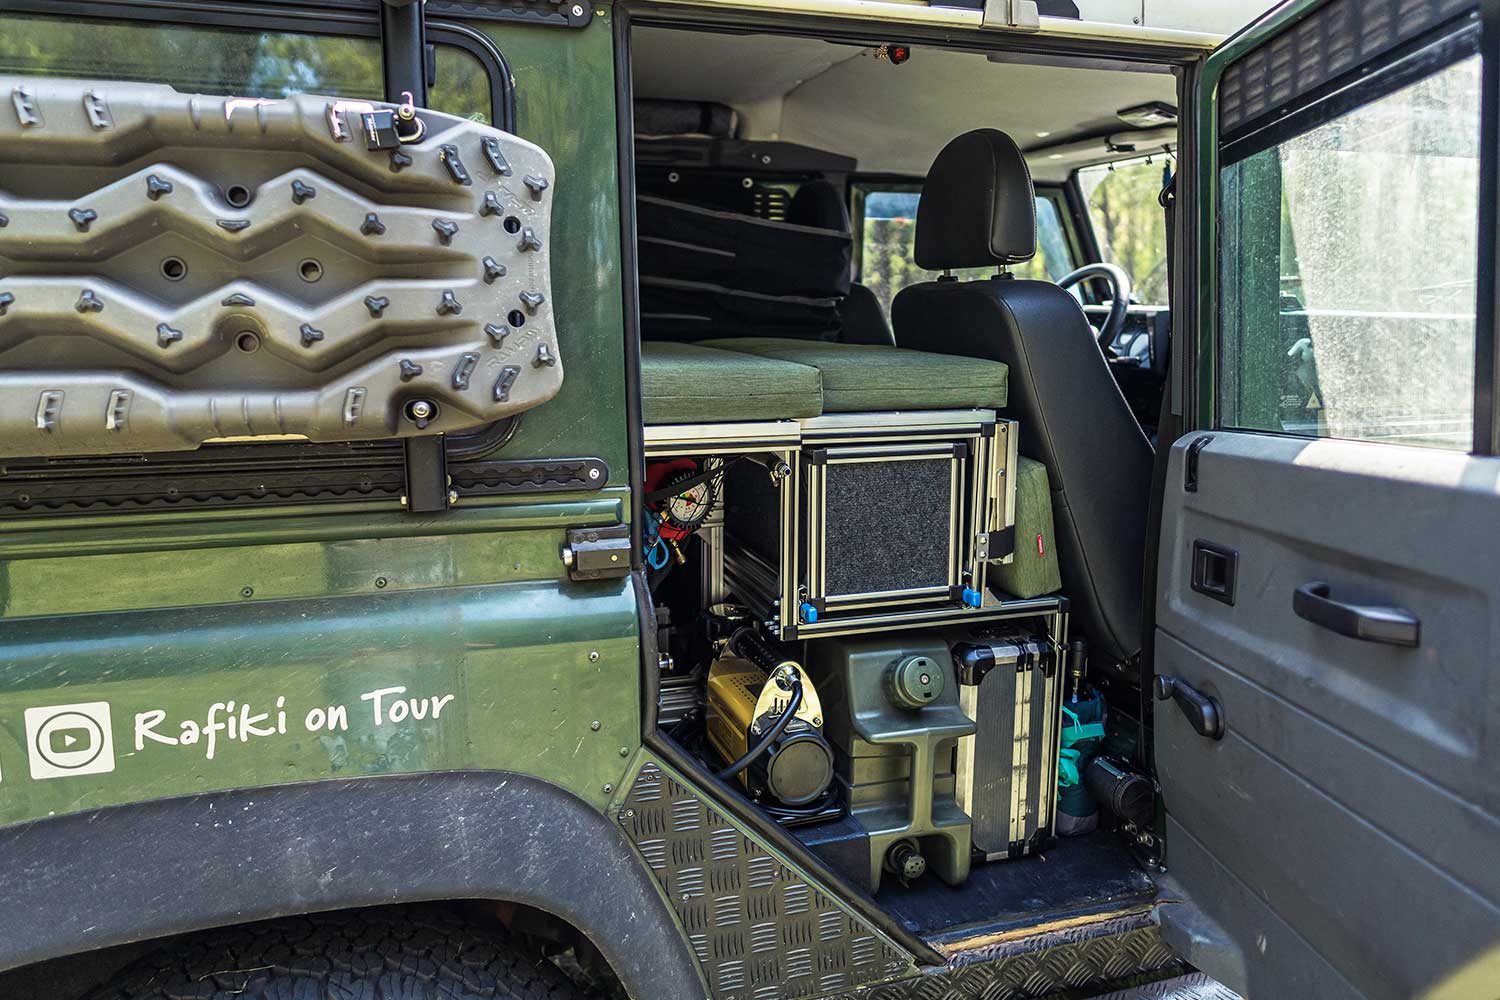
Since our Defender is a five-door Station Wagon we wanted to make the most out of our second-row side doors. That’s why we installed two food drawers on the left (under the awning) and a general drawer on the right.
The drawers on the left are 70 x 36,5 x 21,5 cm (D*W*H) and 70 x 22,5 x 22 cm (D*W*H), with the widest one being the lower one. We’ve done this to accommodate the slightly angled backrests of the car seats. The drawer on the right is 50 x 22,5 x 22 cm (D*W*H). All are fully extendable like the main drawer, can carry 100 kg, and lock in place with the handles.

The Defender has a small back door by nature, making it impossible for it to house a drawer that’s the full width of the car. To prevent us from losing the space above the wheel arches we made access hatches in the bed platform, creating two big storage compartments. We use these compartments to store our off-season gear and long-term maintenance stuff. We installed gas struts for practicality and locks so we could keep our valuables safe in case of a break-in.

Having experienced a lack of access to our previous build, we wanted to improve. We believe that everything you use daily should be ready to grab at any time.
We have accomplished that for the most part and would like to inspire you to follow a similar mantra. Besides all four drawers we’ve also added the following storage spaces:

This is the big eye-catcher of our build! The rear of the Defender houses the 140 x 72 x 35,5/49 cm (D*W*H) fully extendable drawer. This drawer houses our CombiNoord TW75 fridge-freezer combo, the Coleman Stove and Coleman Camp Oven, our pots, pans, and some food.
The whole drawer was created around the CombiNoord fridge, hence the size. We found fully-extendable drawer slides at a length of 140 cm, rated to 120 kg to support the whole setup. We decided to double up and install two sliders on each side, just to be sure. To make the opening process easier, we modified the upper slides to stay unlocked when closed, so only the lower ones lock in place and keep the drawer shut when driving. You can however buy sliders with and without locks, but at the time of our building process, they weren’t available, unfortunately. In a future build, we would like to look at sliders that don’t require grease, as the current ones do leave stains on our clothing sometimes.
Overall, the kitchen drawer has been awesome so far! We just love it!

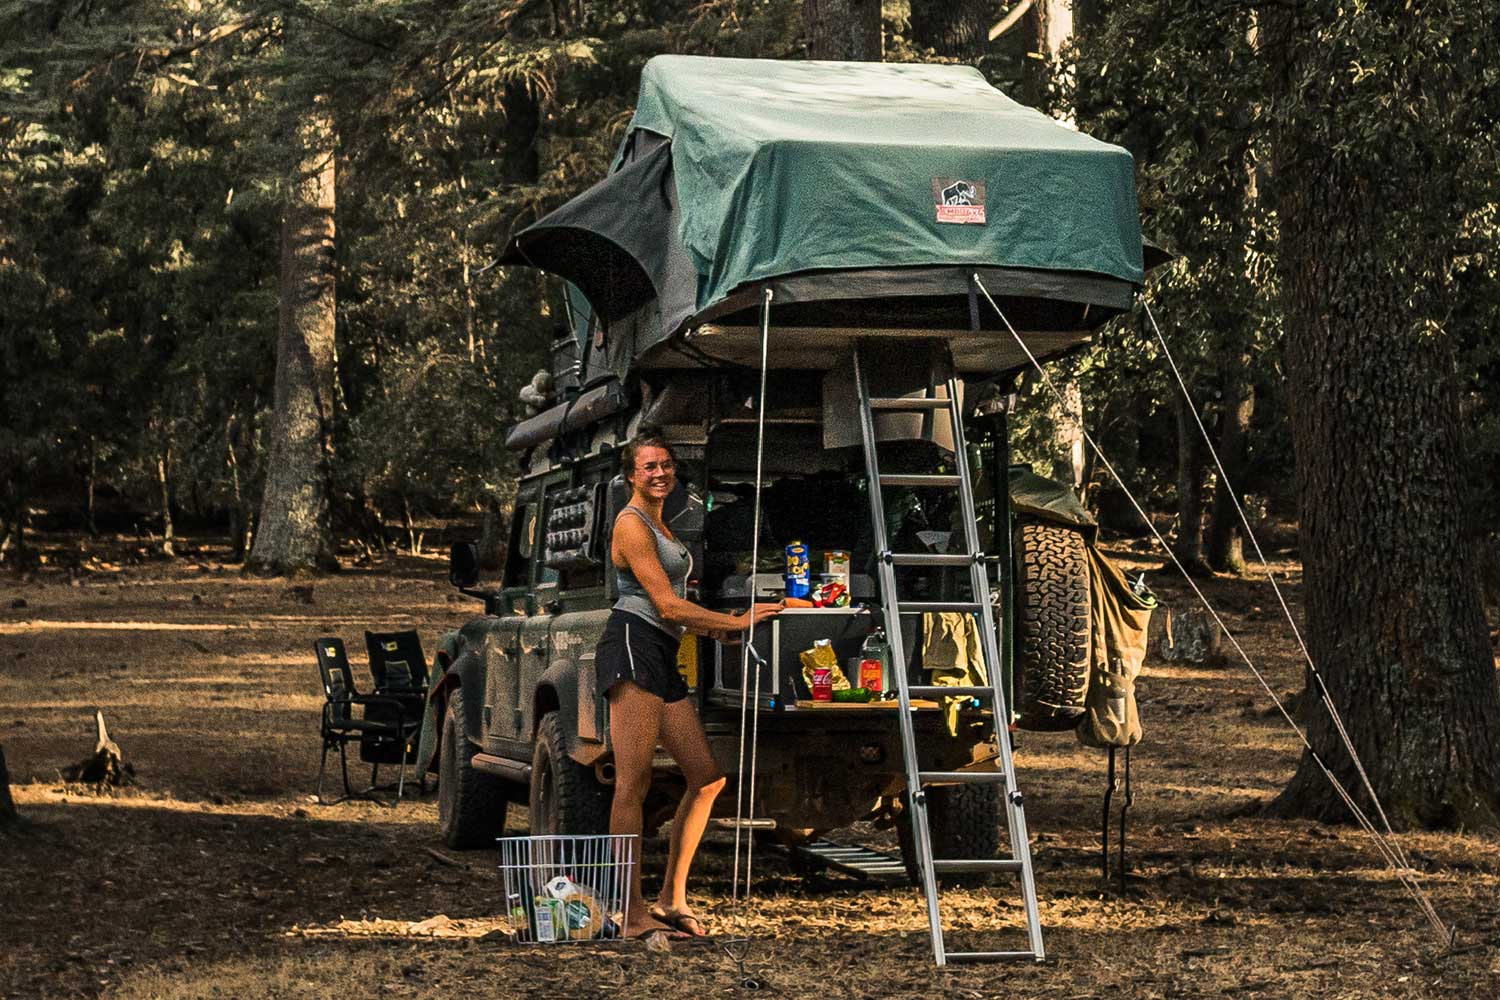
The bed platform is one of the main features of our overland interior build. Our experience during the past seven years taught us it is nice to have a bed within the interior as a rooftop tent is awesome, but not when it’s storming outside.
The bed platform sits on top of all the drawer systems and is made from aluminum BSB profiles, 15 mm plywood with ventilation holes, and covered with heavy-duty carpet. On top of the platform, we have a custom-made mattress of 6 cm memory foam, including mold-resistant removable and washable covers.
The fixed bed is 185 x 135 cm (L*W) but can be extended to 205 x 135 cm (L*W) using lockable angle hinges.

Being content creators at heart, we carry a lot of gear. To make sure we could charge all of our equipment we needed an extensive electrical setup with a multitude of power outlets. And whilst we did stick to our original battery system, we upgraded everything else.
Our modified battery compartment under the seat houses two Optima Yellow Top 75Ah batteries, split by a Cyrix relay. From our auxiliary battery, we run three lines; one through a fuse box for the front accessories, one through a fuse switch for the air compressor, and one through a fuse switch for the living compartment electrical setup.
In the rear, we created a power supply panel that houses a 230V power outlet from the inverter, 230V power outlets from wall/shore power, and a multitude of USB-A, USB-C, QC-USB, and 12V sockets.
We would love to make the step toward lithium as we are currently having some capacity issues. If you are a supplier looking to partner up, just give us a shout!

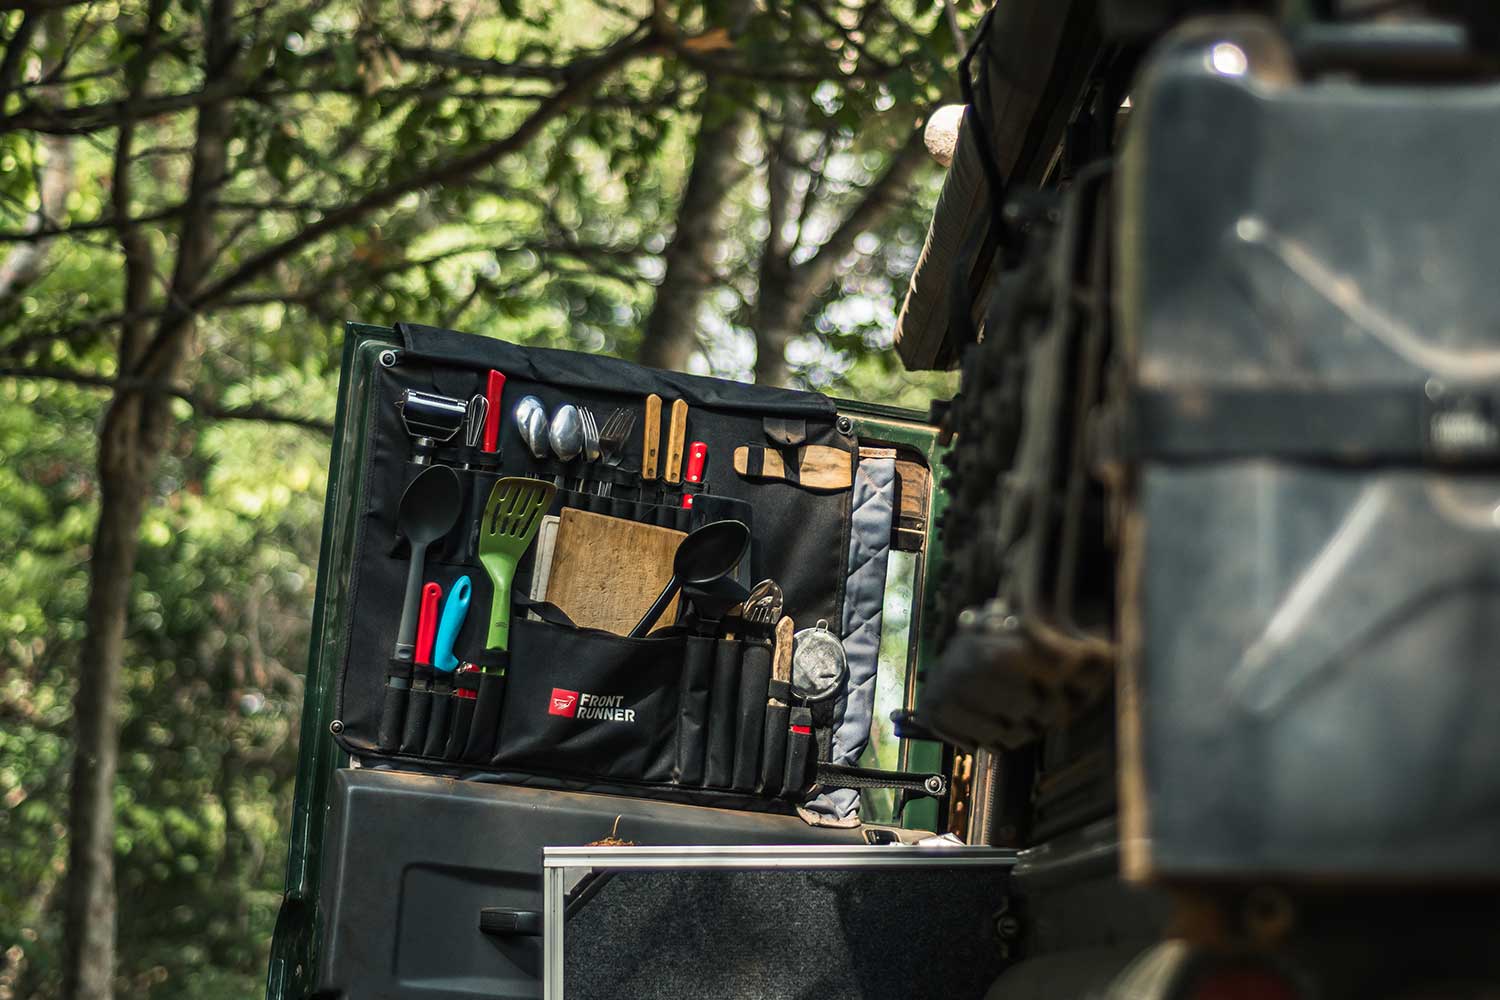
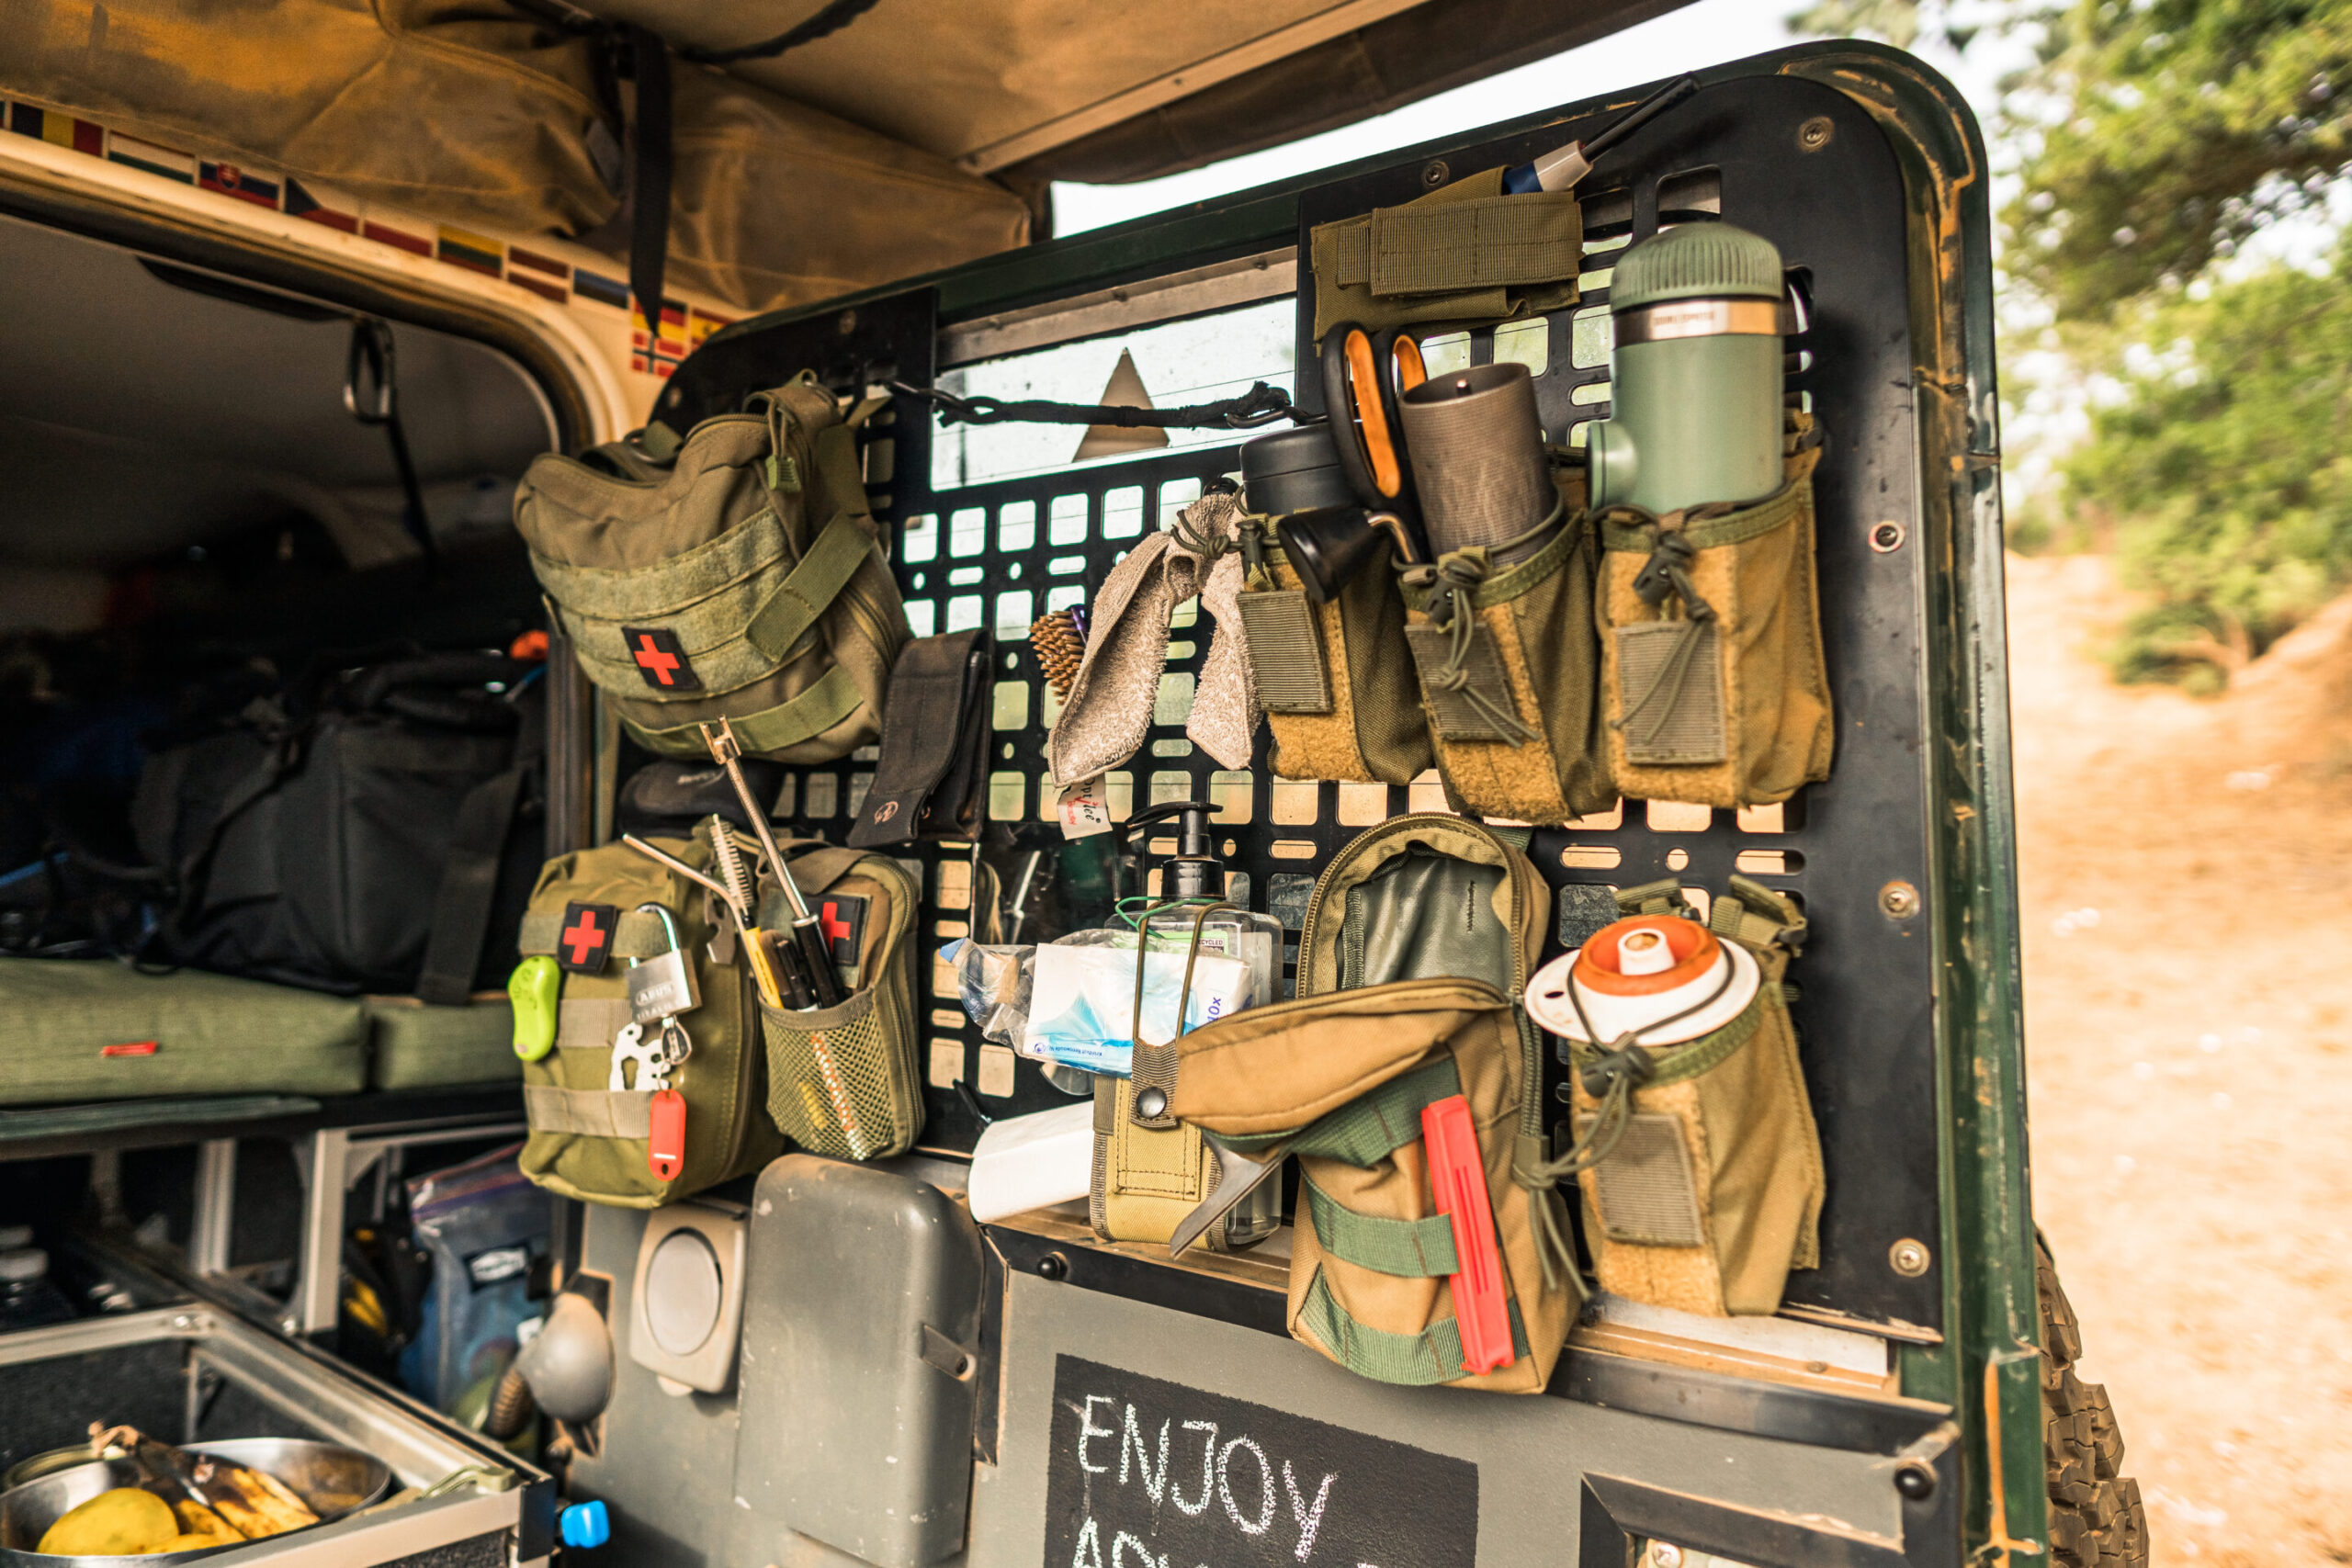
Continuing with the easy access and storage mantra we added Nakatanenga Molle storage panels to most of the windows. These panels fit the trim on the inside of the Defender. They are well-designed, lightweight, and come in a beautiful black coating.
The panels help you to secure the back of your vehicle and prevent an easy break-in attempt. Besides that, they are outfitted with the universal Molle pattern – with both square and circular holes – and are therefore super practical. We installed them on the side sliding windows, the two small rear windows, and the back door window. We outfitted them with a bunch of military storage bags for our gear, medical equipment, and bits and bobs.
Be aware that having a green Defender that’s full of military storage bags isn’t always the smartest when crossing the continent of Africa. So far we’ve had a few discussions with police and customs officers. It hasn’t been a real hassle, but you really have to make clear you are a tourist and not military. (It also doesn’t really help we both like to wear green clothing ;).)

We get questions about our setup on an almost daily basis. Therefore, we think it’s nice to provide you with some insight into why we opted for this setup.
By building this new interior, we switched from a setup where we could sit inside, to a setup where we couldn’t. Having an interior living space is nice, but in all reality, a Defender will most likely be too small to comfortably make use of it. We found that our old interior didn’t offer enough livable space to warrant the setup, making it rather impractical.
Of course, it’s always a trade-off between storage compartments and livable space. For us, the Defender 110 just doesn’t offer enough livable space once we account for the size of the storage compartments.
However, we do think you can make it work with a Defender 110! A great solution to get a usable living space would be to install a pop-top! In our vision, a pop-top with a well-designed interior is actually the ultimate and optimal setup for the vehicle. The pop-top provides you ample living space and often even a fixed bed.
Due to budgetary restraints, the pop-top wasn’t within our building capabilities. Instead, we decided to invest in exploration, adventure, and experience. With the pop-top out of the equation, it was a matter of weighing our options. Looking at the requirements, we definitely needed easier access to our gear, which the new setup provides.
We came up with this design as a result of our experience after 7+ years of travel to the remote corners of Europe. For us, the fixed bed, easy access provided by drawers, and the huge fridge-freezer combo made the difference we were looking for. We hope this thorough review has proven insight into our whats and how’s!
Feel free to reach out if you have any questions about the build.
As long-term overlanders we fully understand the need for high-quality and reliable gear. We know that if gear isn’t up to standard it can hinder your adventures, resulting in discomfort or a dangerous situation.
We write our reviews after extensive testing and with you – an adventurous overlander – in mind. We hope you appreciate our information, and feel free to reach out if you have any questions.
As mentioned above we wouldn’t change much. However, being content creators at heart, a lithium battery would be welcome to provide a larger battery capacity. We use a lot of power, especially in the heat of Africa, and the current capacity is causing some trouble.
Traveling through Africa has also proven to be a dusty endeavor. Therefore, a dedicated storage drawer that’s dust-proof and outfitted with power outlets would be an awesome addition. This is definitely something we would take into consideration for a future build.
Lastly, we would consider a different slider setup. Whilst we used the most heavy-duty sliders on the market, we would like to see a small improvement here. With the current sliders, there’s an exposed piece of the slider on the drawer. When accessing the main drawer from the side this sometimes causes grease stains on our clothing. A greaseless slider would be awesome, but often roller slides aren’t fully extendable. We would definitely dive into this topic a little deeper in the future to find the best possible solution.
Take a look at the questions below before you get started. Answering these key questions will deliver you much-needed insight before you start with your own build.
Keep enough excess space to store items you currently haven’t thought about or things you buy on the road. Don’t forget to check out our ‘Overland travel packing list’ to make sure you don’t miss anything.
As we have evolved from friends on part-time adventures to a couple that wants to live full-time on the road, changes will be necessary. We are now making plans to make this lifestyle financially sustainable and are therefore working digitally more often. Without a doubt, new challenges will arise now that we have made this change in our way of travel. Our future hopefully includes kids and dogs, so with that in mind, we are actually already looking into lithium batteries, pop-tops, trailers, and a new rooftop tent.
If you are a supplier of lithium batteries, pop-tops or roof tents and want to partner up with us, just give us a shout. We would definitely consider rebuilding the vehicle’s setup in order to create a more versatile overlander that is ready to support us for years to come. Planning ahead for our future as a family, and the future of our international trips.
Appreciate this info and have something to spare? Buy us a coffee!
We hope our blog provided you with practical information that’s useful to your adventures. Want to dive deeper into this or other subjects, and plan a call? We are here to help!


0 Comments